Thursday, March 8, 2012

Spring Make-N-Take


Just finalized the projects for the Spring Make-N-Take. Showcasing the Mixed Bunch stamp set and Blossom punch from the Occasions Mini catalog. Absolutely love that matching set. Also, we'll be using one of the stamp sets from the Sale-A-Bration catalog. For every $50 you can choose from a variety of products for FREE! We'll be using the stamp set called Outlined Occasions.

Monday, December 26, 2011

Adorable Gift Box


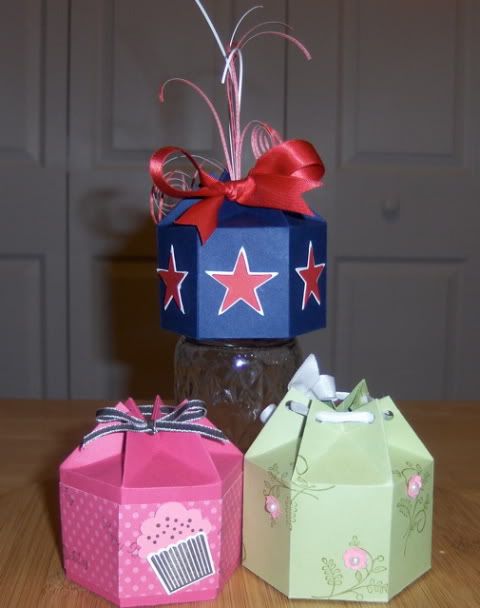
My sister just loves the different handmade boxes, so for Christmas I wanted to make her one to put her present in. I stumbled onto Peanuts and Peppers Papercrafting and she had this adorable box tutorial using the Bigz Mini Milk Carton die for the Big Shot.
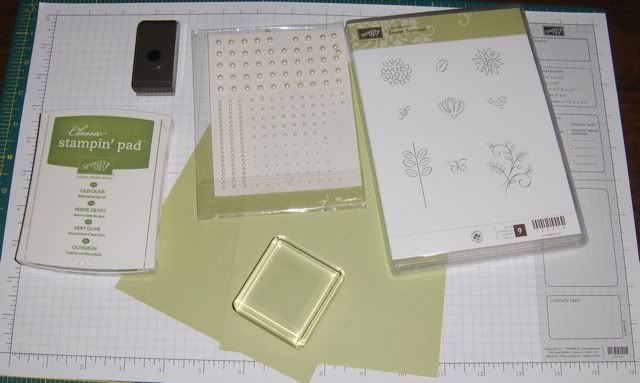
Supplies:
Stamp: --
Ink Pad: --
Paper: --
Die: Bigz Mini Milk Carton
Punch: Crop-a-dile or handheld punch


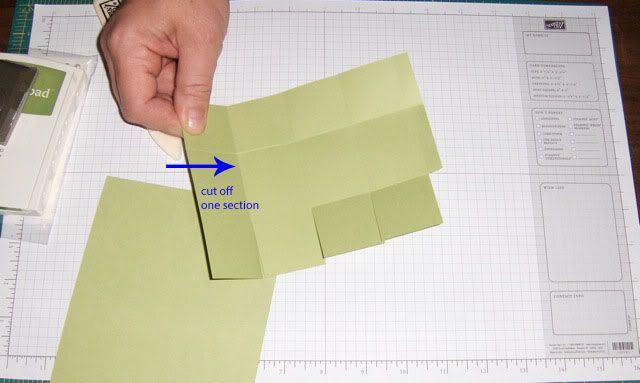
Cut out two pieces from the Mini Milk Carton from the same color paper. Crease all the lines well using a bone folder. Cut away and discard one section, leaving 3 full sections and the tab.


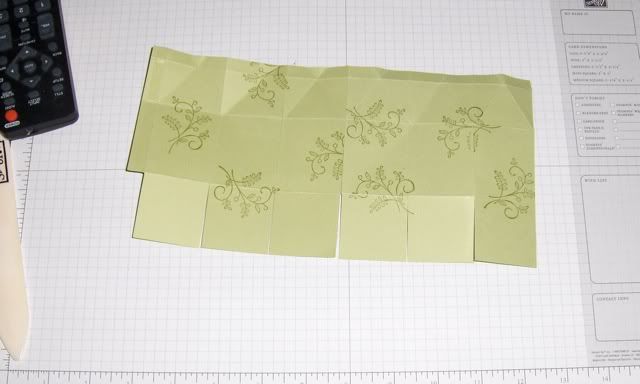
Depending on finished style box, stamp the images on sides and top of box.

Apply tape to the two tabs. Lining up the two pieces carefully, tape them together, pressing down firmly on the tape line.

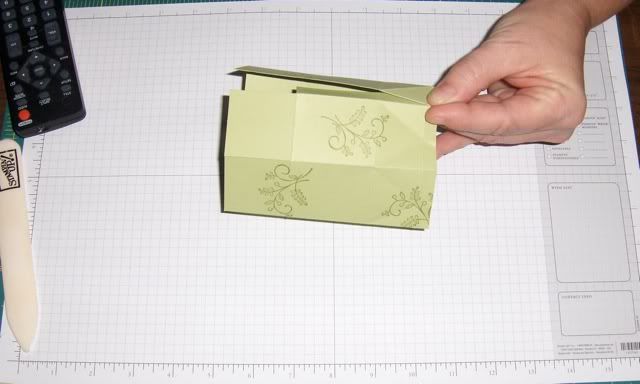
Forming a circle, again line up the two pieces together, firmly pressing down for a secure hold. I did not use redline tape on the box. The sides that are taped does not seem to have any stress on them to pull them apart. Just press firmly for secure hold.


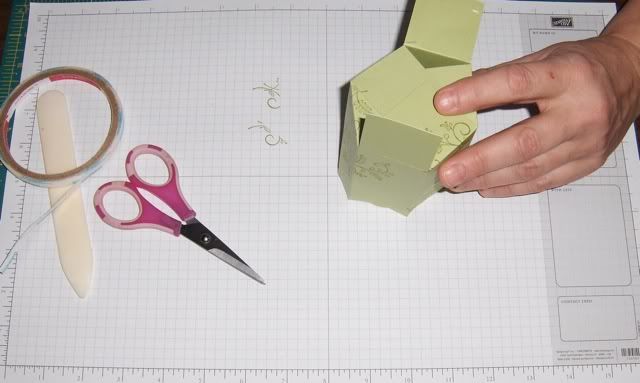
Apply tape to one section of the bottom, leaving it free. Press down the remaining five bottom tabs, evenly shaping the box to a hexagon. When satisfied with shape, press down the remaining bottom tab.


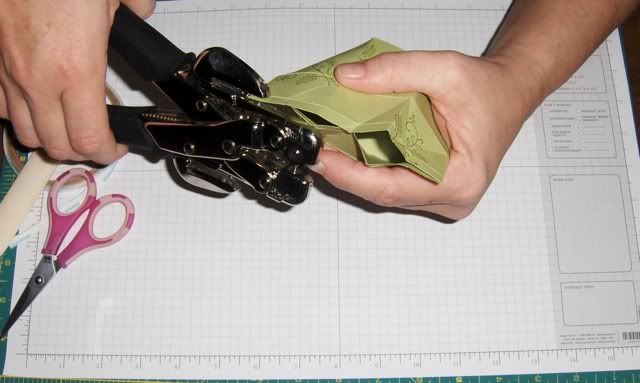
Each side of the box's top section is folded so that the triangle is pushed in. When finished there will be six tabs that stand out. Using either the crop-a-dial or handheld, punch a hold in each to run ribbon through. Tie box closed and finish decorating.

Sunday, November 20, 2011

Quick and Easy Favors

I like to make favors for my grandkids to take into school for each holiday. The new 1x8 cellophane bags from the holiday mini is perfect! The schools like to not over give candy to the kids, and most of them now days have to have the candy wrapped. It's always a little bit of a challenge to decorate the candy for the kids. Here are the Thanksgiving favors I sent into school this year. Very quick and easy to do. Two of the Smarties candies fit perfectly in them.

Supplies:
Stamp Set: Give Givers (from Holiday Mini 2011)
Ink Pad: Old Olive, More Mustard, Cajun Craze, Riding Hood Red, Crumb Cake
Paper: Whisper White
Punch: Curly Label
Accessories: Blender Pen, Cellophane Bags (from the Holiday Mini)

Friday, November 18, 2011

Sweet Pressed Cookie Stamp


I dug out my favorite cookie recipe I make during the holidays to try with the Sweet Press set from Stampin' Up. It worked so perfect! So exciting to see my go-to recipe work so easily. After such success with my butter cookie I tested out a cream cheese cookie recipe. As you can see, both turned out beautifully. Only problem now is which one to grab when reaching for a cookie! Enjoy the recipes below and let me know how yours turn out.

To get a hold of you own Sweet Press Cookie Stamp set, contact me. It's only 16.95 (plus shipping and handling) and available until January 3rd.

Philadelphia Cream Cheese Cookies

1 package cream cheese, softened
1 cup (2 sticks) butter, softened
2/3 cup sugar
1/4 teaspoon vanilla
2 cups flour

BEAT cream cheese, butter, sugar and vanilla with electric mixer on medium speed until well blended. Mix in flour. Refrigerate several hours.

ROLL dough into 1/4 inch thickness on lightly floured surface. Cut with 2 1/2 inch cookie cutter. Place cookies on cookie sheet. Dip Sweet Press into flour and stamp each cookie, dipping back in flour after each stamp.

BAKE at 350 degrees for 12 to 15 minutes or until edges are lightly browned. Cool on wire rack.

Butter Cookies

2 1/4 cups all purpose flour
1/2 teaspoon salt
1 cup confectioners sugar
1 cup (2 sticks) butter, softened
1 egg
2 teaspoons vanilla extract

MIX all ingredients together in large mixing bowl. Blend well and chill for easier handling.

ROLL dough into 1/4 inch thickness on lightly floured surface. Cut with 2 1/2 inch cookie cutter. Place cookies on cookie sheet. Dip Sweet Press into flour and stamp each cookie, dipping back in flour after each stamp.

BAKE 400 degrees for 8 to 10 minutes. Cool on wire rack.


Wednesday, November 2, 2011

It's Good to be a Hostess!


Wow! Stampin' Up is having a great promotion for hostess. It runs between November 1st and December 15th. If you ever thought about hosting now would be the time. Hostesses will receive an additional $35 in free Stampin' Up! products when they hold a workshop totaling $350 or more (excluding tax and shipping)! This is in addition to all the other benefits they already get as a Stampin' Up! hostess.

I you would like to hostess a Stampin' Up! workshop, contact me at 410-941-9228 to schedule your party before December 15th.